 |
| Matt Benn & his roundabout bicycle |
The Circle City Bicycles blog contains info on bicycles, cycling events, pro racing, bicycle touring, and just about anything else cycling related. Since our bike shop is located in Indianapolis, we focus on biking in the Midwest, but cycling fans anywhere in the world should find this blog interesting. We try to post daily Monday through Friday, but we occasionally miss a day. Each Friday we try to have an interesting bicycle related photo.
Friday, January 29, 2016
Friday Photo - Roundabout Bicycle
Thursday, January 28, 2016
7 Solid Tips to Help You Become A Better Cyclist

When You Want To Improve, Where Do You Start?
The Basics.
1. Buy the right bike for you
Carbon fiber? Aluminum? Race geometry? Comfort oriented?
These are just a few of the many options that you must choose from when selecting a bike. Plus, bikes aren't just one-size-fits-all. It's important to know what you want from your cycling experience to choose the best bike for those needs. Are you commuting? Starting an exercise program? Do you want to try racing bicycles?
Come in to Circle City today and we can help you find a bike that does exactly what you want it to do!
2. Ride intervals to get faster and fitter
Try an interval structure like this (from mensfitness.com):Interval Workout 1: Build Endurance
Go the distance with this workout, which builds aerobic endurance with long intervals performed at well below lactate threshold (6–7 on a 1–10 intensity scale). Spin easily for 5–10 minutes to warm up, then shift into a larger gear (try big ring in front and middle of the cog set in the back) and pedal at a slow cadence (70–75 rpm). Go for two 15-minute intervals broken by seven minutes of easy spinning recovery. Cool down with 5–10 minutes of easy spinning.
Interval Workout 2: Increase Lactate Threshold
Quash lactic acid buildup with this workout, performed at or slightly below lactate threshold (roughly a 7–8 on a 1–10 intensity scale). Use a heartrate monitor or power meter to keep yourself honest, or just listen to your breath: Labored but deep and controlled breathing is perfect. Start with an easy 5- or 10-minute warmup spin, then do three eight-minute intervals separated by four minutes of recovery spinning. As your work capacity increases, you can increase the duration of the intervals to as much as 20 minutes with 10 minutes recovery. Cool down with 5-10 minutes of easy spinning.
 3. Set some goals
Some people feel a little embarrassed about jotting down what they want to achieve, as it may seem a tad serious. But it’s extremely useful. It shows that you want to take your cycling seriously, you want to become fitter, and most importantly, you want to enjoy it more. Putting something in your diary makes it much more likely to happen and research even states that those who set goals are more likely to stick to what they set out to do.Having a plan like this doesn’t mean you’re a geek — it’s there to help. And the quicker your goals and stepping stones are identified, the quicker you can go about them.

4. Wear the right clothes
You will feel so much more comfortable wearing the right clothes. And tight-fitting bibs and jerseys reduce drag
5. Fuel properly
Sports nutrition doesn’t have to mean eating expensive supplements; bananas, cereal bars and jam sandwiches all contain lots of easily absorbed carbohydrates, are convenient to carry and easy to eat.
6. Work on Climbing
Climbing is a big aspect of riding. Intervals will help you be able to pace yourself when on an incline, but the best way to get better at climbing is to get out there and climb!
7. Ride in a group
Riding in a group teaches you road etiquette, and makes the whole process even more fun! Why are you still reading this? Go outside and ride your bike!!
Circle City Bicycles and Fitness
5506 Madison Ave.
Indianapolis, IN 46227
(317) 786-9244
Wednesday, January 27, 2016
Wednesday Video - Peter Sagan Doing Tricks
If you follow the Tour de France, you are used to seeing Peter Sagan of Slovakia in the green (top sprinter) jersey. Here is a video that shows him doing tricks and having fun on his bike. It is two minutes and nine seconds long.
Monday, January 25, 2016
Bicycle Banana Holder
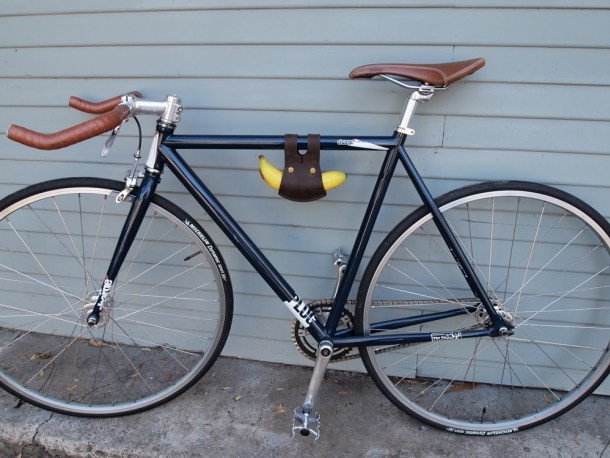 |
| The banana is loaded and the bike is ready to roll |
Here's a video that shows how to install it on your bike and load it with a banana.
Friday, January 22, 2016
Friday Photo - The Hopworks Beer Bike
 |
| Owner Christian Ettinger & the Hopworks Beer Bike |
If you want something like this for yourself, check out the Metrofiets Draft Bike, which starts at just under $7,000. Keep in mind that you can be busted for DUI while riding your bike just as you can be when driving your car. Indiana law requires your blood alcohol level to be below 0.08% while operating a vehicle on public roadways.
Our photo comes from Cool Material. Below is a video from YouTube which shows the beer bike at a festival in Portland.
Wednesday, January 20, 2016
Wednesday Video - Funny Cycling Moments
We're starting a new feature on our blog - Wednesday Video. Each Wednesday we'll have an interesting cycling related video. This one is entitled "Funny Cycling Moments." It is a compilation that includes some crashes, podium mishaps, a horse in a bike race and other comic events. The best segment is the one at the very end, so be sure to watch it all the way through. Total run time is four minutes and ten seconds.
Missouri Law Would Require 15 Foot Flag on Bicycle
 |
| St. Louis BWorks will oppose this bill |
"This bill requires every bicycle operating on a lettered county road to be equipped with a fluorescent orange flag visible from the rear and suspended at least 15 feet above the roadway."Not surprisingly, this idea is not popular with cyclists in the Show Me State. John White of the SpringBike Bicycling Club summed it up best:
"This is the dumbest idea in a long time."The lawmaker says he knows 15 feet is ridiculous, but wants to get people talking about bicycle safety. The best thing to do to increase your visibility is to wear bright clothing and put a flashing red light on the back of your bike.
You can track the progress of the bill online. My guess is that it will not pass because it just too stupid.
Monday, January 18, 2016
Hoosier Antique & Classic Bicycle Club Winter Swap Meet
 |
| Past winner at the swap meet |
Friday, January 15, 2016
Friday Photo - Cycling the World on a Penny Farthing
 |
| Joff Summerfield with the Taj Mahal in the background |
The plan for the 2014 tour was to ride across North America to the Rockies, then turn left and ride until he ran out of land. He started at Toronto in June, heading west, and crossing the U.S. border into Michigan. He stayed in the northern tier of states until he reached Montana, then headed southward. His route included some of America's greatest national parks, including Glacier, Yellowstone, Grand Tetons, Zion and Grand Canyon. Jeff called the Grand Canyon:
"My number one most beautiful natural thing I have seen in the world "From there he passed through Las Vegas and San Diego on his way into Mexico. Jeff continued through Central America, but took a flight from Costa Rica to Venezuela, bypassing Panama. In South America he continued on to Colombia and Ecuador, where his tour came to an unfortunate end last December. He was robbed and his life threatened. After that he took a flight back to England. Let's hope that after some time to recover from this traumatic event, he'll be back on the road again with his penny farthing.
Here's a video Joff did just before starting off on his Tour of the Americas:
Thursday, January 14, 2016
Boardman Elite Air 9.2 is Ideal for Triathlon, Road Racing and Criteriums
 All-New Aero Design Boardman Elite Air 9.2 is Stiffer and Lighter
Designed to be ridden fast, the super slippery AIR frame, fork and seat-post cut through the air with minimal air displacement ensuring that once up to speed you stay there. 
Features
 |
| Tom Ballard - Immediate Media |
New AiR Aerodynamic Racing frame, fork and seatpost
Deep and narrow tube profiles on the frame and fork, an aero seatpost, fully internal cable routing (with the cables entering the frame behind the steerer), a front brake integrated into the fork, and a rear brake positioned under the bottom bracket. All this is designed to make the AIR as slippery as possible.
The C10 frame is used for all the Elite AIR bikes from the 9.0 right up to the signature model. In the past Boardman have split the range with a cheaper layup in the lower models, but that's not the case anymore. It's clearly aero-optimised but at the same time it has fairly classic road bike lines; for instance, the seatstays are a wishbone design to keep surface area to a minimum, but they're not dropped down the seatpost like many new-generation aero frames. Similarly, the seat tube is flattened but the back wheel isn't cut into the tube.
 |
| Tom Ballard - Immediate Media |
4 Position Seat Post
Ensures that riding position can be dialed from 73-75 degrees for either Road, TT or Triathlon disciplines
Other Features:
— Full internal cable routing with cables entering behind the headtube for further airflow enhancement and clean lines
— Mold design incorporates one piece PF30 bottom bracket and optimized oversize box section chainstays with steep taper at dropout for maximized power transfer and strength
— Internal front brake for enhanced airflow
— Stable, predictable geometry to cope with all race situations
— Full carbon fork with tapered fork steerer for increased stiffness and steering precision
— Mechanical and Di2 compatible cable routing
"Through the extensive use of cutting-edge Computational Fluid Dynamics and Wind Tunnel testing, the AIR frameset has been honed to offer a performance advantage across a wider degree of yaw angles than other manufacturers," Boardman say.
Boardman is keen to point out that they've not been concentrating only on aerodynamics with no thought to how the bike will ride. "Careful consideration was taken during the design phase to ensure that in our pursuit of aero, we didn’t destroy the handling, stiffness or comfort as it needs to be as enjoyable to ride as it is fast", they say. So like the top-end race frame, the SLR, the AIR uses a one-piece bottom bracket and chainstay design to make power transfer as efficient as possible, and the fork uses a 1.5" bottom race to add stiffness to the front end.
Dura-Ace transmission components, from Shimano's top-end mechanical groupset, take care of shifting. FSA supply the 52/36 SL-K chainset, and at the back there's a Shimano 105 12-25 close ratio cassette; again, that's a nod to against-the-clock riding while still giving a big enough spread of gears for more general use. Brake callipers are made by Tektro: there's the integrated linear-pull front brake in the fork, and a direct-mount Tektro calliper under the bottom bracket.
"This means that the AIR will out perform the competition in the real world, no matter where or when you ride"
Full Specs List:
FRAMESET
Frame: Boardman AIR, C10 Carbon
Fork: Boardman T8, Carbon, Carbon Tapered Steerer
Bottom Bracket: FSA BB-PF30
Fork: Boardman T8, Carbon, Carbon Tapered Steerer
Bottom Bracket: FSA BB-PF30
GROUPSET
Crank: FSA SLK
Chainrings: 52-36
Front Derailleur: Shimano Dura - Ace
Rear Derailleur: Shimano Dura - Ace
Shifters: Shimano Dura - Ace
Front Brake: TRP Integrated (TKB55)
Rear Brake: TRP (T714R)
Cassette: Shimano 105, 12-25
Chain: FSA Team Issue
WHEELSET
Wheels: Boardman Air Elite Five
Hubs: Boardman Straight-pull, 20H front / 24H rear
Spokes: Stainless Steel butted, Aero-blade
Rims: 35mm aero profile, Clincher
Tires: Vittoria Rubino Pro (25C)
COMPONENTS
Saddle: Prologo Nago Evo 141
Seatpost: Boardman Elite AIR Carbon
Stem: Boardman Elite Alloy
Handlebar: Boardman Elite Alloy
Grips: Boardman Soft-grip
Circle City Bicycles and Fitness
5506 Madison Ave.
Indianapolis, IN 46227
(317) 786-9244
Tuesday, January 12, 2016
Light and Versatile 2016 Scott Genius 700 Tuned Plus Full Suspension Mountain Bike Review

Nimble, Stiff and Sleek, the 2016 Scott Genius 700 Tuned Plus is Ready To Rumble
Any Trail, Any Time

Ride Quality
Loose, rocky climbs and technical, root infested sections can be tackled out of the saddle and on the gas. - Bike Radar
When descending, the Genius 700 Plus provides a lively ride and can be thrown all over the place. Scott has done a good job with the geometry, sitting the rider in a fairly neutral position that allows for easy weight shifts and instils confidence on steeper sections. Providing you’re within that pressure sweet spot, there’s enough support from the wide (40mm internal) rims to carve turns hard, with no real squirm from the tires.

The Genius 700 Plus has 140mm of front and 130mm of rear travel, the Genius LT 700 Plus has 160/160mm of travel. Both bikes feature the latest evolution of FOX’s suspension highlights as well as Plus tuned suspension. Together with SCOTT’s patented TwinLoc system incl. true lockout and the SCOTT geo- metry adjustment chip, riders couldn`t ask for more adjustability or versatility. Our Plus geometries come with slacker head angles of 67.5° (Genius Plus) and 65.8° (LT Plus) and provide for super stable handling in rough trail and downhill sections and for more aggressive cornering.
`
It’s when it comes to tackling particularly dicey obstacles or sections of trail that the pluses of the Genius Plus really come to the fore. The well-balanced suspension and rollover confidence and overall boost in traction from the girthy tires make you feel invincible when carving root-covered cambers at speed.
Geometry
The Genius Plus’s geometry has been redesigned to perfectly accommodate the new plus-size tire measurements and standards.

The super-short rear triangles are Boost-ready and provide clearance up to 3.0”. Rear (148mm) and front hubs (110mm) enable wider bracing angles, increased wheel stiffness and better overall handling of the bikes. Both Genius 700 Tuned Plus and Genius LT 700 Plus feature a SRAM X01 optimized 1x11 Boost Drive Train. Even though Boost pushes the chainline out three millimeters, the Q-Factor remains the same.
The headtube angle on the Genius Plus is a slack-and-stable 67.5 degrees, and the bottom bracket is a tad lower on the plus model than on the previous 29er model.
Wider Tires
Scott worked closely with Schwalbe to develop the 27.5+ tires on Scott’s Plus line, and the general thinking behind it is that wider is better for stability, traction, acceleration, and cornering. In order to give the tire the right shape to accomplish all those lofty expectations, the Schwalbe rubber is mated to 45mm-wide Syncros rims (40mm inner-width and 21mm height). Scott bought Syncros in 2012 in hopes of using the in-house brand to develop components technologically specific to its bikes, and the Plus rims are a good example of that: The wider rim allows for an increased tire volume, presumably leading to a more comfortable ride, more traction in corners, and more lateral tire support.
INCREASED STABILITY WITH LESS AIR PRESSURE
 Combining a wider tire with a narrow rim requires higher air pressure. On the other hand, increasing the width of the rim results in better stability. Wider rims add a significant amount of lateral support to the tire and reduce the walking effect. Wider, bigger tires come into play and enable riding with lower air pressure. From trail to all-mountain and enduro riders, the Syncros
27.5'' Plus wheel set offers a unique ride quality
including the fun factor.


Circle City Bicycles and Fitness
5506 Madison Ave.
Indianapolis, IN 46227
(317) 786-9244
Monday, January 11, 2016
Stylish New Bicycle Helmet Design
 |
| The best thing about this helmet is that you don't look like a complete dork wearing it - Not! |
"It can save your life, but so can half a watermelon - Both look equally stupid!"
Friday, January 8, 2016
Friday Photo - Tour de Palm Springs
 |
| Tour de Palm Springs |
Thursday, January 7, 2016
Need To Spend Christmas Cash? How About A Beer Jersey?
We've Got Great Looking Jerseys From Most Top Beer Brewers
From Amnesia Brewing Company to Schlafly Pale Ale
(Sorry, we don't have any beer jerseys from companies starting with Z...)
Choose any of our jerseys to support your favorite brewery. Or, if you don't drink beer, check out our collection of State, City and Nation Beer Jerseys.


At Circle City Bicycles, our first priority is helping you to expand your love of cycling. We've got bicycles, accessories, racks and panniers, jerseys, tools, and much much more!
Come in today to see our full selection, or see our website for a few examples of what we have to offer.
Circle City Bicycles and Fitness
5506 Madison Ave.
Indianapolis, IN 46227
(317) 786-9244
Tuesday, January 5, 2016
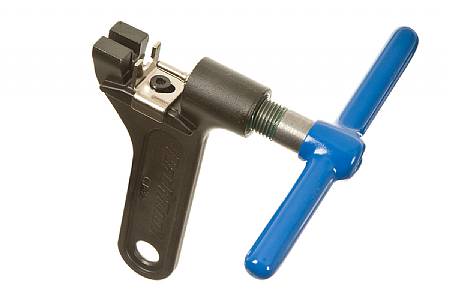
How to Replace Your Chain - 8 Steps With Pictures!
 Is Your Chain Damaged Or Worn Out?

It is important to find out exactly how worn it is.
The best way to find out is to use a chain wear indicator. It sits in the chain and determines how far apart the chain links have stretched. If it's between 0.5% and 0.75%, you should be able to change the chain and not worry about the rest of the drivetrain. If it's over 0.75% you will probably find that you need to change your cassette and - granted this would be a worst case scenario - you may even have to change your chainrings.
That being said, it is a good idea to replace your chain when it has only very recently reached the 0.5% mark.
Tools Needed:
Chain tool
Bike Stand (optional)
Steps:

The B-tension screw alters the distance between the upper guide pulley and the first sprocket on the cassette. Make sure this is set correctly BEFORE removing your chain, so you don't have to guess when installing the new one.
2. Check that the chain isn't too long or too short
Put your chain on the smallest gear on the front and rear derailleurs. The chain should still have a good amount of tension. If the chain is too long, the rear mech will pull up and the chain will brush up against the bottom derailleur.
To check that it isn't too short, you need to put your cassette and crank on the largest gears. The rear mech should be under a lot of tension, but still have enough give to prevent the chain from being stretched.
If your chain is "just right" - you can use your old chain to measure your new chain.
 3. Decide where the old chain is going
If you are throwing this chain into a bucket of parts and never plan to use it again, that's fine. But if you would like to use it on a different bike, make sure that you do not dislocate the original joining pin. The original joining pin looks just different enough from the rest of the pins.
 Removing the chain

4. Attach your chain tool to a link of chain other than the original pin. Make sure it lines up level and flat and drive the pin all the way out. You may need a new joining pin depending on the chain you have.
Measure Twice, Cut Once
 5. Once you have the correctly fitted new chain ready to install on your chainless bike, grab one end of the chain and feed it through the derailleurs. Start with the rear, feeding the chain up and over the first jockey wheel, and then under and around the second jockey wheel.
From there, the chain should go back again towards the rear of the bike to go up and over the smallest cog in the cassette, and stretch towards the front of the bike over the lowest front gear.
Since you did not alter your B-tension screw, the tension is still properly set and you can measure your chain to be sure you cut just enough off to fit your bike.
When measuring in the smallest of both the front and rear gears, you must remember to leave a couple chain links length for the extra distance the chain will travel when it moves up to the bigger gears. (Some say it is best to do your measuring on the largest of the gears. We'll leave it up to you. Or, try both!)
Finshing Up
6. Remove the pin of the link you have selected (remember that some chains use quick release chain links which need double male ends of the chain, and others connect male to female)
7. Attach the chain together using a QR Chain Link or with a new joining pin.

(7.5) For QR Chain links, once connected, you may have to run the chain through a few pedal cycles to get it to finish locking together. The best way to do so is to run the link to the top of the loop, and alternate pedal direction to snap it into place. You will find a small arrow on one of the links that indicates the direction the chain should go.
8.With the new chain fitted, everything should work as it did before. You just want to make sure that when you go for the largest gear in your drivetrain that there is enough slack in the system that there are no problems or damage caused to the bikes.
Now you're ready to get back out there!
Circle City Bicycles and Fitness
5506 Madison Ave.
Indianapolis, IN 46227
(317) 786-9244
Friday, January 1, 2016
Friday Photo - Kokomo Polar Bear Ride
 |
| 2015 Polar Bear Ride |
Subscribe to:
Posts (Atom)